We wish you all very Happy New Year

With the latest update of TrakIT, accounts can be approved on a line item basis on the actuals. As a result, invoices can be approved and bills can be validated only if the accounts within the invoice or bill are also approved (or don't require approval).
Account approval works only on the Actual Accounts, not the Estimates. All Estimates are approved together as usual.
Setting Up
In the Finance Masters, you can set up the approval mode for each account individually. Edit an account and set the field Approval Mode as per below.

If Modified from Estimate - When the estimates are approved and transferred to the actuals, these accounts are automatically set to approved. If a user changes any of these accounts, the account is set to up-approved. Once un-approved, they must be again approved by a user with permission to approve the accounts.
Approval Always Required - These accounts are always set to un-approved state and will always require approval. If any change is made to the account after approval, they will require to be re-approved.
Approving Accounts
Approval of Actual accounts happens after the approval of the Estimates. Estimate accounts are approved altogether (not individually). Once the Estimates are approved, the Actual Accounts are displayed with the 'Appr' column that indicates the state of approval.

Accounts can be approved by selecting the checkboxes next to the accounts and selecting 'Approval Accounts' from the Task button menu.
Approval can be performed by a user whose role includes the permission to approve estimates.
For any question or concerns, please contact TrakIT Support.
With the ever growing number of customers, transporters and other entities in the system, it can become confusing to pick the correct entity as there may be several same or similar entity names from different countries.
TrakIT now solves this problem by linking entities to one or more companies, so the entity may only be used by companies where the entity belongs.
This is done on the 'Per Company' tab under the entity.

When an entity is first created, the responsible company of the user creating the company is automatically assigned to the entity. If more companies need to access the entity, the selection can be made here.
If you find an entity cannot be selected when creating or editing a work order, it is likely that the entity is not selected or available for your company. Please ask your administrator or TrakIT support for assistance.
For any clarification or questions, please reach out to TrakIT Support.
Previously, the invoice table header was not being translated to the local language of the invoices. This has been implemented with the new TrakIT update.
If a non-English template is being used for generating the invoice, TrakIT will also translate the table header of the invoice to the foreign language as per a new setting defined in the Form definitions.
The following fields are available in the Invoice Form templates:
Language

The language selection does not affect the rest of the template - which can be in any language or a mix of languages.
Table Display

The option affects both the table header and the account names. Please note that account names are not translated. You must specify the local name for the account in the Admin > Finance Masters section.
Important: This change may affect the output of your current invoices that are not in English. Please double-check the invoice before sending them.
Adjusting Translations
TrakIT uses the Google Translation services to obtain translations. After getting the translation, TrakIT saves it in a Translation Cache table.
It may be possible that the translation does not match the correct term in the local language.
In order to fix incorrect translations, SysAdmins can go the Admin > SysAdmin Tools > Translations. TrakIT will display a list of translations saved in the cache. These can be updated with the correct translations.
For any issues or clarifications, please contact TrakIT Support.
In certain situations, it may be required to back-date an invoice that is generated by TrakIT. This is now possible with certain settings on the company and user permissions.
To allow a user to back-date an invoice, the following must be set up:
1) Company Settings
Under Admin > Companies, edit the company information and set these two fields:
Back-dating: Set how many days an invoice can be back-dated.
Back-date Month Closing: Set the day of the month after which an invoice cannot be back-dated to the previous month.


2) User Permissions
Go to Admin > Role Management > Role Customization. Select the relevant role, expand the Finance section and then the Invoice section.
Switch on the permission for 'Allow Back-dating'
Only users with this permission (and SysAdmins) will be able to back-date invoices.
Back-dating the Invoice

Please note that back-dating invoices may result in non-sequential or mismatched order of invoice numbers.
For any questions or concerns, please contact TrakIT Support.
With the ever increasing requirements of businesses, we have made some changes to the way taxes are handled in TrakIT. It is now possible to define multiple taxes with different codes under the same tax master in a specific country. Here is how to set up taxes in TrakIT so they work without any user intervention.
Country Taxes
Each country has its own set of taxes. TrakIT allows you to create these taxes along with rates and codes for each country. Go to Admin > Finance Masters > Country Taxes and select a country.

Default Taxes for Accounts
When adding Accounts to the workflow definition, you can specify the default taxes that will be applicable for the account. Multiple taxes can also be selected, provided they belong to different tax codes.

Adding Taxes Manually
If default taxes have not been set, it is possible to add a tax manually on any account, provided it is defined under the Country's taxes. Previously, it was possible to set the rate manually. This is not possible anymore and the tax rate will be automatically picked from the Country Tax definition.


For any questions or clarifications, please contact TrakIT Support.


With the latest update of TrakIT, you can now link and update the document checklist while uploading or updating documents.
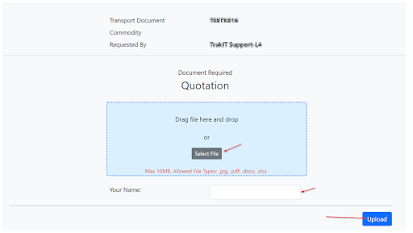
Uploading Documents
If a Document Checklist is defined in the Workflow, you will be able to select a checklist item and also set the status of the item when you are uploading a document. If you select a checklist item, then only one document can be uploaded at a time.

Linking a Document to the Checklist
If a document has already been uploaded, it can be linked to a checklist by selecting the modify option on the document.


With the latest update of TrakIT, the calendar popup for populating events has been changed to allow faster one-click entries of the event with a 'Quick Select' section.

The correct way to use this calendar is as follows:
Immediate Event Update
If you are updating an event immediately after it happens (which is the preferred way), you can simply click "Current Date/Time" to populate the current time into the event box. In almost all cases, this is the default selection that should be used.
Delayed Event Update
If the event is being updated after a significant delay (for example, the event happened yesterday), then you must first set the time of the event on the right side and then click the date on which it happened. If the time is not set, the default time of 12:00 will be used.
Future Time/Date
For Info-Only events like ETA, ETD, etc., simply click the future date on the calendar. It will be entered with the default time of 12:00. If a different time is required, it can be set prior to the selection of the date. Future dates are enabled only for Info-Only events.
Not Applicable / To Be Advised
If an event is not applicable for the work order, simply select "Not Applicable". If the event time is not yet known, simply select "To Be Advised".
Clearing the field
Use the 'Clear' link to clear any existing data in the text box.
For any questions or clarifications, please contact TrakIT Support.
With the latest update of TrakIT, all workflows now have multi-company finance capability - without having the set the 'Multi-Company' option in the workflow definition.
However, this also means that users can now access accounts only of their own assigned companies. The selected company is displayed at the top left of the finance page. If the users has access to only one company, the drop-down will be disabled for the user.


The main menu is the portal through which you can quickly access different modules and area of TrakIT.
In the latest update of TrakIT, the main menu has been redesigned to support dynamic menus which will be introduced soon.
Old Menu
The new menu is lighter and faster to respond. A few items on the Admin menu have been re-organized.
We have been working on re-designing the main menu to make it dynamically controlled. This means that, in the future, we will be able to control visibility of the menu items based on the user's role, company or location.
If you notice any issues with the new menu, please let us know immediately.
Advanced Reports are powerful reports that can be used to set up any number of reports based on any requirements. These reports can be scheduled to be sent out automatically as and when needed.
A single advanced report consists of the report definition, a list of fields or columns contained in the report and a list of subscriptions for that report. The subscriptions in turn, have a selection of filters that apply to the subscription only.
Over the years, we've found that most subscriptions within a report largely use the same set of filters - with just one or two filters that are actually specific to the subscriptions. Adding a new filter for a report required the filter to be added to all subscriptions one by one.
With the latest update, we've create a new section for filters that will be applicable to all subscriptions. These filters will be available in a new tab called 'Filters' present on the advanced report detail page.


For any questions or concerns, please contact TrakIT Support.
The Entity Management section is the master data for all entities that are involved in the shipment. TrakIT has several types of entities available. Some of these are linked to the work orders, but some not.
Based on business requirements, the following changes have been implemented in Entity Management:
Multi-Type Entities
Previously, an entity could only be one type. A customer could only be a customer and not a transporter. This lead to the creation of some duplicate entities where the same entity was acting in multiple capacities.
Now, a new tab 'Multi-Type' has been added that can allow you to assign multiple types to any entity. The entity will still have it's primary original type. But it can now have additional types as well.

Customer, Shipper & Receiver
Previously, the Shipper & Receiver fields in the shipment would pick directly from the Customer entities. Now, the Shipper and Receiver have been created as independent entity types that can be separate from customers. 'Contractual Customer' has been renamed to simply 'Customer'.
The original Customers have been assigned the additional types of Shipper & Receiver so as not to make any breaking changes.

