Monday, 14 April 2025

Changes to the Tax Layout

Based on user feedback, the layout of taxes on account line items has been changed. This applies to Invoices, Quotations and Bills.

Previously, an invoice would display taxes as a separate column for each applicable tax. For example, if there were 2 taxes applicable for different line items, these would be shown in two columns.

With the new layout, the tax columns have been re-organised, as shown below.


The Tax Name, Tax Amount and Total+Tax columns are not fixed to display the relevant content based on the tax type. If a line item has more than one tax, it will be shown as separate lines within the same column.


For any questions or concerns, please contact TrakIT Support.

Saturday, 29 March 2025

Phantom Event/Data Issue

Issue Summary

On Thursday, the 27th of March, at 14:50 UTC, an update was rolled out to all TrakIT installations. This update caused an issue when work orders were reset. The problem caused some events and data fields in the work order to be replicated in other work orders where the same fields were empty. The issue was rectified, after which the extra events and data fields with incorrect values were cleared. No data was lost, and no other modules were affected.

The majority of TrakIT installations were not affected. Only those installations where one or more work orders were reset during this time were affected. If your installation was affected, our support team has been working with you to restore the affected data.

We want to sincerely apologize for this issue. We understand that this may have disrupted your workflow or affected your experience, and we deeply regret any inconvenience this may have caused.

Issue Details

An update was made to a stored procedure that resets a work order. This procedure is called when a work order is reset manually or when the workflow and/or services are changed. It can also be called with an action after an event or data field is changed. 

The Reset procedure performs five steps:

  1. All events & data are copied into a temporary table.
  2. Extra events & data are removed from the work order. In case of a workflow change, all events & data fields are removed.
  3. Events & data that are missing are added to the work order. In case of workflow change, all events & data fields are added as per the workflow set-up based on the services selected, job type, and customer selection.
  4. In case of workflow change, restore the temporary table into the event & data fields that match the code of the original fields.
  5. Reset KPIs to match the workflow definition.

In step 4, an issue was identified that was preventing the restoration of events and data fields after the change of the workflow. The update issued on Thursday attempted to fix this issue. While the issue was fixed, events and data were also restored on other unrelated work orders on empty matching fields. It is important to note that only empty events and data fields were populated. No existing events or data were overwritten at any time.

Upon discovery of the issue, the cause was identified and fixed at about 09:30 UTC on the 28th of March. Subsequently, affected events & data rows were identified and cleared using available backups as a reference.

Root Cause

While the update to the stored procedure was tested extensively on work orders by changing workflows in test scenarios, the test cases only tested the work orders on which the updates were performed and failed to notice the full impact of the modified procedure.

Recurrence Prevention

Updates to stored procedures that involve bulk updates or insertions shall be verified against expected row counts. Expected run times shall also be measured and verified when testing stored procedures. A more careful impact analysis shall be performed on such updates.


Please be rest assured that we take this matter seriously. We work diligently to identify and resolve such problems, and we will implement measures to ensure that similar issues are prevented in the future.

We truly value your trust and patience as we strive to improve. If you have any concerns, questions, or feedback, please do not hesitate to reach out to us at support@trakit.in. Your insights are invaluable to us and help us serve you better.

Thank you for your understanding and continued support.


Wednesday, 22 January 2025

New Event/Data Filters for Advanced Report

With the latest update of TrakIT a new 'Event/Data Values' filter has been introduced for Advanced Reports. Previously, it was only possible to select either completed or not completed events/data fields as filters. Any other condition had to be added as a custom filter by the TrakIT Support team.

The new filter 'Event/Data Values' has replaced the previous 'Completed Event/Data' and 'Not Completed Event/Data' filters.


You can select one or more event/data codes. For example: DEL, ETA. If any of the event/data fields match the condition, the work order will be included in the report.

The values of the event/data field can be compared with a list of available options explained below:

  • not empty/TBA - Value must be not empty or "TBA" (To Be Advised)
  • NA - Value must be "NA"
  • TBA - Value must be "TBA"
  • empty - Value must be empty
  • a date this month - Value must be a date that falls in the current month
  • a date this quarter - Value must be a date that falls in the current quarter
  • a date this year - Value must be a date that falls in the current year
  • a date from - Value must be a date that falls on or after the specified date
  • a date up to - Value must be a date that falls on or before the specified date
  • a date between - Value must be a date that falls in between the specified dates (both dates inclusive)
  • a date within last - Value must be a date within the last specified number of days
  • a date within next - Value must be a date within the next specified number of days
  • a partial match - Value must be a partial match for the specified text
  • starting with - Value must begin with the specified text
  • ending with - Value must end with the specified text
  • an exact match - Value must be exactly the same as the specified text
  • not containing - Value must not contain the specified text
  • from list - Value must be exactly one of the items in the specified list of items (comma or semi-colon separated)
  • a number >= - Value must be a number equal to or greater than the specified number
  • a number <= - Value must be a number equal to or less than the specified number
  • a number in range - Value must be a number in range of the specified numbers (both inclusive)


Please note that all text comparisons are case-insensitive. "ABC" is the same as "abc".

The 'Negate Condition' checkbox inverts the condition set for the filter. For example. If you have set the 'Ending with' filter, negating it becomes 'Not ending with'.

By default, the event/data filters only look for events and data in open work orders. To search within closed work orders, select the 'Include closed WO' checkbox. Note that this can cause the report generation to take a lot longer than it normally would. Do not use this option unless you really need it.


For any questions or clarification, please contact TrakIT Support.

Thursday, 14 November 2024

Make Advance or Partial Payments or Receipts

With the latest update of TrakIT, you can now register advance payments from vendors and register future bills against the payment. Similarly, you can receive advance payments from customers and register future invoices with the payment receipt.

Registering a Payment

On the Finance > Receipts & Payments page, select the Payments tab. Enter the details for the payment that was made to the Vendor.

Once the payment is created, you can register zero or more existing bills against it. You can even approve the payment without allocating any bills. 

The payment detail page now has a new button: Finalise. The payment can be finalised only when the allocation of bills equals the payment amount. Once the payment is finalised, no further changes can be made.

Registering a Receipt

The procedure for registering receipts is the same as for payments. Once the receipt has been created, you can approve it with or without allocating invoices to the receipt.

After approval, you can generate the voucher or receipt copy to send to the customer. Future invoices from the customer can then be allocated to this Receipt.

Once the Receipt has been allocated to invoices and the outstanding is zero, the Receipt can be finalised.


For any questions or concerns, please contact TrakIT Support.

Tuesday, 15 October 2024

Introducing Tags

The latest update introduces the ability to define "tags" for various elements such as Workflow, Advanced and Query Reports, Entities, and Assets. This new feature provides users with the flexibility to categorize and organize these components based on their specific needs.

By assigning tags, you can create a more structured and efficient system, making it easier to manage and retrieve relevant data. Whether you're dealing with complex workflows or numerous assets, tags allow you to tailor the organization to fit your workflow, improving overall productivity and clarity.


Adding New Tags

To add one or more tags, simply type the tag name and press enter. Tags are not case-sensitive. So, "Internal" is the same as "internal". You must use the correct capitalisation when defining a tag for the first time.


Adding Existing Tags

If you've used a tag before, it will appear in the list of selections when you type a few characters.


Filtering on Tags

You can search by tags on the main page for the reports, entities or assets.


We hope you tags help you to organise your reports, entities and assets better and more efficiently.


Thursday, 22 August 2024

Depot, Geography & Location Terminology Updates

Depots have traditionally represented various physical points such as warehouses, ports, terminals, and airports, where consignments are picked up or delivered. To better reflect the diverse range of these physical points, we are renaming Depots to Locations. This change is purely terminological, with no impact on functionality. You can still assign GPS coordinates for precise locations if needed.

In line with this update, the Depot Type master data field will be renamed to Geo Data. This field will now accommodate any type of geographical location when added to the workflow data. You can select this Geo Data type using the drop-down menu present when editing the field. Additionally, the Custom Filter field remains available for TrakIT Support to further refine selections.

The previous Location field, which allowed place lookups using Google, will now be renamed to Google Places.

GPS Location of Assets and Users is now renamed to Position.

We apologize for any inconvenience this change may cause, but we believe it better aligns with the evolving data requirements in TrakIT.

Here is a summary of the renamed fields:

Old Field New Field
Depot Location
Geographical Location     Geo Data
Location Google Place
Asset/User GPS Location Position


For any questions or concerns, please contact TrakIT Support.


Thursday, 15 August 2024

Connect TrakIT with Power BI, Tableau, Google Data Studio and other Dashboarding tools

With the recent update of TrakIT, you can now use your TrakIT installation as a real-time data source for Dashboarding software such as Power BI, Tableau, Google Data Studio and many more.


Configuring the Data Source

TrakIT does not allow direct connections to its database. However, TrakIT can expose any information via a web API endpoint that can be used to retrieve information from specifically designed query reports.

The API endpoint must be in the following syntax:

https://trakit.[yourcompany.com]/api/public/queryreport?APIKey=[YourKey]&RepID=[ReportID]&AsFile=true

Replace the highlighted parts above with the correct information. Please connect with the TrakIT Support team to obtain your API Key and Report ID. The "AsFile" parameter allows you to directly get the report in the designed format (xlsx, csv or txt). If set to false, the API responds with Json format data.

Please note that the above endpoint is accessible from the web to anyone who has the URL and hence must be kept strictly confidential.


Embedding the Dashboard in TrakIT

If the dashboard software you use has the capabilities for embedded dashboards, please let us know the embedded Url for your dashboard and we can include the dashboard in any internal dashboard page in TrakIT.


For any questions or concerns, please contact TrakIT Support.


Monday, 22 July 2024

MS Teams, Google Space & Telegram Messaging

With the latest update, you can now send automated messages and notifications to MS Teams Channels, Google Spaces and Telegram Channels. These channels can be internal or external. For TrakIT to send messages to these channels, you need to create these channels first and obtain the webhook URLs or Chat IDs as necessary. 

Once the webhook URLs have been obtained, go to Admin > Integrations > Messaging and create a new Message Channel. Once created, these channels will be available as a selection under "Send Message" when creating actions for Events or Data in workflows.

Here are the steps to do so:

MS-Teams

1) In the New Teams client, select Teams and navigate to the channel where you want to add an Incoming Webhook.

2) Select More options ••• on the right side of the channel name and select 'Manage Channel'


3) Click 'Edit' under Connectors


4) Search for Incoming Webhook and select Add.


5) Select Add again on the popup.

6) Provide a name for the webhook (Example: TrakIT Notifications) and upload an image if necessary. If you would like to add the TrakIT logo, download it from here: https://trakit.in/img/trakit-logo.png


7) Copy and save the unique webhook URL present in the dialog. The URL maps to the channel and you can use it to send information to Teams.

8) Under Admin > Integrations > Messaging, add a new MS-Teams integration and add the Url here.

For more guidance, take a look here: Create an Incoming Webhook - Teams | Microsoft Learn


Google Spaces

1) In a browser, open Google Chat. 

2) Go to the space where you want to add a webhook.

3) Next to the space title, click the expand more arrow, and then click Apps & integrations.


4) Click Add webhooks.

5) Enter the title of the webhook (Example: TrakIT Notifications)


6) In the Avatar URL field, enter: https://trakit.in/img/trakit-logo.png and save it.

7) To copy the webhook URL, click the three dots on the right, and then click the Copy link.

8) Under Admin > Integrations > Messaging, add a new Google Space integration and add the Url here.


Telegram

1) Create the channel or group where you want TrakIT to post messages.

2) Search for and add the bot @TrakIT_Telegram_bot to the channel or group

3) Go to the properties of the channel or group and note its ID (example: @trakitmessages)

4) Under Admin > Integrations > Messaging, add a new Telegram integration and set the Chat ID as obtained in step 3.

Please note that the TrakIT Telegram Bot does not respond to messages. It will only provide notifications.


For any questions or guidance, please connect with TrakIT Support.


Tuesday, 2 July 2024

New HR Module

As TrakIT continues to evolve, incorporating more features and functions, we are excited to announce the addition of a new module that further establishes TrakIT as the premier one-stop solution for logistics workflow ERP systems.

In the coming weeks, we will introduce a comprehensive Human Resources (HR) module. This module will be accessible through a new "HR" menu option under the main menu. Designed to streamline the management of all personnel, the HR module will cater to employees, contractors, interns, and any other individuals working within your organization.

The initial rollout will include two key components:

  1. Employee Master Page: This page will serve as a central repository for all employee information, allowing you to efficiently manage and access personnel records.
  2. Attendance Module: This feature will enable you to log daily attendance for all employees, providing an easy-to-use interface for tracking and reporting attendance data.

We are eager to hear your feedback and constructive criticism as we continue to enhance TrakIT to better meet your needs. Your input is invaluable in helping us refine and improve our offerings.

As always, if you have any questions or concerns, please do not hesitate to reach out to TrakIT Support. We are here to assist you.

Friday, 21 June 2024

Internal Posting

Many companies using TrakIT have internal and independent profit centres. Until now, there was no way to allocate income and expense accounts internally in TrakIT.

With the latest update, we have introduced a new page called "Internal Posting" under the Finance menu. Income and Expense accounts in jobs can now be allocated internally. Internal Posts function similarly to Invoices and Bills, except there are no external entities involved. Additionally, the net total of accounts allocated to the posting must be zero.

Here are some key points about how Internal Posts (IPosts) work:

  • You can allocate Income and Expense accounts (not disbursements).
  • You cannot allocate accounts that are already allocated to an invoice or bill.
  • You cannot allocate accounts to bills or invoices if they are already allocated to an IPost.
  • IPosts can be approved only when the sum of Income and Expense accounts is exactly zero.
  • IPosts can be approved only if all allocated accounts are approved (or don't require approval).
  • Accounts linked to IPosts can never have taxes.
  • Sequence numbers for the IPost will be generated upon approval.
  • Permissions for IPosts can be defined in the Role Management section by SysAdmins.
  • Once synced to Finance systems, the FinRef field will be populated.


IPosts do not affect the profitability of a job, and they do not affect billing or invoicing. 


For any questions, concerns, or guidance, please contact TrakIT Support.

Thursday, 23 May 2024

Enable Time-based OTP for Two Factor Authentication

TrakIT now supports time-based one-time passwords (TOTP) that can be generated by most Two-Factor Authentication apps.

To enable TOTP authentication for any user, modify the user's profile and select "TOTP".


Once enabled, TrakIT will ask the user to register their preferred authenticator app upon the next login.


The user can use any TOTP-based authenticator app like Google Authenticator, Microsoft Authenticator, Authy, Duo and many others. 

Once registered, the user will be asked for an OTP every time they successfully log in.


TOTP authentication is superior to SMS-based TFA, as it is more secure and doesn't require data or a network connection.


For any questions or concerns, or if you're facing any difficulty with setting up your TOTP based TFA, please contact TrakIT Support.

Monday, 29 April 2024

Update Events from QR Codes

It is a challenging task to get drivers to update pickups, deliveries and other events using the TrakIT Mobile app as they may not be well-versed in how the app works.

With the latest update, we've made it extremely simple for drivers to update events in a work order by simply scanning a QR Code from the TrakIT Mobile app.


Set-Up

On any Work Order-based form (such as Pickup Order or Delivery Note), insert the QR Code in the place where you would like to display it. The code will contain the event that needs to be triggered. It is also possible to have multiple QR codes on a single form (one for each event). Ideally, a description of the QR Code should be placed below the code. An example (with a dummy QR Code) is shown below.


Trigger

Once the form is printed, the driver can open the TrakIT Mobile app, tap the scan button on the bottom right corner and scan the QR code. Upon successful scan, the event is immediately updated and the driver is notified of the same.

Any automation actions on the event will be triggered immediately - such as sending an email or SMS to the customer. If the event was already updated previously, it won't update again.

Please note that the validation rules in place for the event are still valid. If the event cannot be updated due to some other validations in place, the error message is returned to the driver.


Please contact TrakIT Support to help set up QR Codes for your forms or let us know if you have any questions.


Wednesday, 27 March 2024

TrakIT Buyer's Guide

You heard about TrakIT, but are not sure if you should go for it or if it's the right fit for you. Well, you've come to the right place. We've compiled a list of common and frequently asked questions. We hope this will help you in your decision.

What is logistics workflow management?

Logistics workflow management refers to the detailed coordination of complex operations involving people, facilities, and supplies. It encompasses the planning, organizing, managing, and executing of all logistics activities needed to move goods, services, and information from the point of origin to the destination. This process is crucial for ensuring that the right items are delivered to the right place, at the right time, and in the most efficient and cost-effective manner. 


What's a workflow?

A workflow is concerned with the specific sequence of tasks that need to be completed to achieve a particular part of a business process. It’s about the organization and movement of tasks and can often be improved or automated to increase efficiency.

Let's say you are shipping cargo from China to the USA. There are dozens of steps, a large amount of data to be captured, documents to be generated, emails to be sent, reports to be generated, people to be informed, and so on... This must be repeated for each shipment. The "plan" for this entire process is called a workflow. Examples of workflows:

  • Ocean Cargo Import (or Export)
  • Airfreight Import (or Export)
  • Employee Onboarding
  • Truck Servicing
  • Financial Audit
  • Warehouse Management
  • and many more...

TrakIT allows you to build your workflows from scratch - with no limitations on the complexity of the workflow. Any number of routine tasks and reports can be automated. You can define your own rules and validations as well as generate any number of documents that you need.


What's a Work Order?

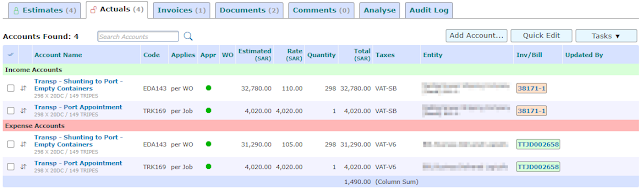
A work order is the smallest unit of cargo or a job that can be tracked individually by TrakIT. This typically relates to a single container or truckload. A job or shipment will consist of at least one Work Order. There may be hundreds of Work Orders under a single job.


Is my data secure?

Yes! We provide dedicated installations of TrakIT for each of our customers. There are no shared databases. All data transfer is secured by SSL and encryption. Our application as well as the organisation is ISO27001-2022 compliant.


Can I have the application on our own server?

We normally host TrakIT on Amazon servers in the US. If you wish to host TrakIT on your own server, you can do that. You will need to provide us access to the server at all times to maintain and update the application. TrakIT is built on the Microsoft .Net stack, hosted on IIS and requires an SQL Server database.


How much does it cost?

Ah! The most important question. Unlike other SaaS solutions, we pride ourselves on being partners rather than just software vendors. There are no charges for setting up the system and training your users. There are no "per user" charges and no limits on the number of workflows that you can create. There are no limitations in the system - all modules are available for use.

However, we do charge a tiny amount per work order. This means that when your business does better, we get paid a bit more. And when your volumes are low, we get paid less as well. Of course, there is a minimum charge required that depends on the volume of work orders you will create per month. Get in touch with us and we can send you a detailed proposal based on your needs.


What about integrations?

TrakIT provides its own APIs for external systems to consume data. We also integrate with finance systems, port authorities, shipping lines, GPS providers and any other system you want to interface with. If you require some custom integration we can develop that for you as well.


Do you have an app?

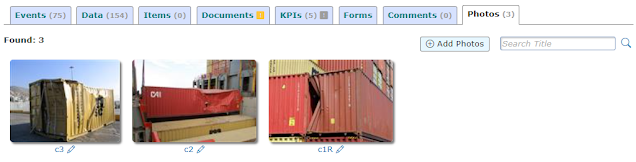
Yes, TrakIT Mobile is an Android app that complements the main web application. You can update your shipments on the go. Take and upload photos of cargo, and documents as well as get signatures directly from the consignees. GPS tracking can be enabled if used by your drivers. You can install the app from TrakIT Mobile - Apps on Google Play


Do you have a Customer/Vendor portal?

Yes, your customers can log in to TrakIT to see the status of their shipments, download/upload documents and also track the location of their cargo in real-time (provided GPS tracking is enabled). 

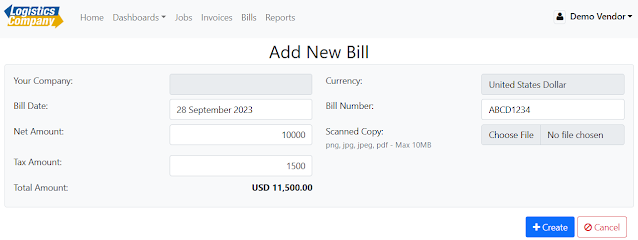
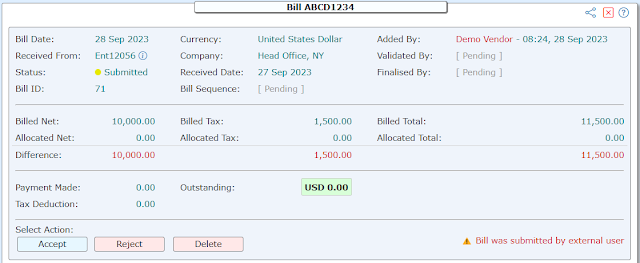
Your vendors can log in and submit their invoices by adding them directly to the system along with a scanned copy of the bill. This can then be accepted or rejected by your finance team.


Can you provide Track-&-Trace functionality?

Yes, we support APIs and plugins for your website to directly display a "Search your shipment" function. Let us know what you need and we can add it.


If you have any more questions, please connect with us a sales@trakit.in or support@trakit.in 


Sunday, 18 February 2024

Automate Now!

Did you know that you can set up TrakIT to automatically take any number of actions after an event occurs? Automation is one of the system's core features.

Are you manually sending messages, documents, or reports to internal users, customers or vendors? Ask TrakIT Support to set up the system to automatically do what you need based on when you need it done.


Set up scheduled reports to send information to anyone based on specific filters.


Automatically send notifications and messages, as well as post documents to other systems via API or FTP. If there is something you need to do automatically, let us know and we will implement it.

TrakIT also supports TrakIT-to-TrakIT communication and updates. And provides webhooks for other systems to update data in TrakIT. We develop and implement custom integrations with external systems such as terminals, port authorities, and finance systems using any kind of file exchange format. 


Connect with TrakIT Support to learn more.


Monday, 29 January 2024

Get Finance Notifications

With the latest update of TrakIT, you can now subscribe to the required notification for the Finance Module as well. This functionality is available for the sub-modules of Finance.

Go to System > Email Notifications > Finance tab.


Notifications can be received in the form of email, chat, SMS or WhatsApp. A user can only subscribe for notifications for themselves. 

For System Administrators, a list of all active users is displayed and the Admin can assign notifications for any user.

If the user has access to multiple companies, then the Company dropdown is enabled and displays the list of companies accessible for the selected User.

A user can only be subscribed for notification to any sub-module in case they have “Read” permission for that module. Otherwise, the checkboxes are disabled for that specific module.

Please note that SMS and WhatsApp notifications are enabled only if configured for your company and the selected user has their mobile number set in the user profile.

For any questions or concerns, please contact TrakIT Support.


Saturday, 2 December 2023

Photos for Work Orders

From time to time, our customers need to store images of containers, goods, damages, equipment, etc., on TrakIT. Although it was previously feasible to upload photos under the Documents tab, accessing these images required downloading them again.

In our most recent update, we've introduced a dedicated "Photos" tab within the Work Order. Users can now conveniently upload photos here, and they will be showcased in a gallery format, displaying all images as thumbnails. By clicking on a photo, users can easily view them in a slide-show format.

Visual documentation through photos adds an extra layer of clarity and precision to the communication and record-keeping associated with each shipment. They can capture the condition of the container or truck at various stages, providing a visual history that can be crucial for dispute resolution, quality control, and accountability.

Below is a preview of the newly added Photos tab:


The title of each photo can be changed as required by clicking the title.


Enabling Photos Tab

To enable the 'Photos' tab on a Work Order, a couple of steps need to be taken:

1) Enable on Workflow - Go to Admin > Workflow Management. Select the Workflow you need to enable photos on. Go to the "WO Tabs" tab. Select "Photos" and click Save.


2) Enable Role Permissions - Go to Admin > Role Management. Select the Role Customisation tab. Select a role that you need to provide access to. Under Operations > Work Orders, scroll to the bottom and select the permissions needed.


As this is a new feature, we are eager to hear your feedback on this. Please let us know if you face any issues while using the Photos tab.


Saturday, 9 September 2023

TrakIT for Canadian Freight Forwarders!

As we continue to navigate the evolving landscape of the logistics industry, embracing technology and innovation becomes essential. TrakIT is excited to share insights from a strategic market analysis in Canada, highlighting the immense potential for freight forwarders to streamline their operations and achieve unparalleled efficiency.


Canadian Market Insights

In our recent analysis, we discovered that the Canadian logistics industry is rapidly embracing digital solutions. With a robust and growing trade network, freight forwarders in Canada are seeking cutting-edge technologies to optimize their workflows, improve customer service, and stay ahead of the competition.


How TrakIT is Making a Difference

TrakIT, our comprehensive logistics workflow management software, is tailored to address unique challenges faced by freight forwarders. From real-time tracking, customized processes and automation to customizable reporting, customer/vendor portals and 24/7 accessibility, TrakIT empowers businesses to drive operational excellence and elevate customer satisfaction.


Key Benefits of TrakIT for Canadian Freight Forwarders

  • Completely customizable: Build your software functionality based on your business processes rather than the other way around.
  • Efficient Workflow and Automation: Streamline processes and reduce manual efforts, ensuring smooth and seamless operations.
  • Trigger any number of actions automatically at any step – Email, SMS, WhatsApp, hit an API, save to FTP, sending documents and much more.
  • Data-Driven Decisions: Leverage real-time analytics and dashboards for informed decision-making and strategic planning.
  • Global Connectivity: Stay connected and in control, anytime and anywhere, enhancing your reach and capabilities.
  • Increasing Operational Efficiency: Delegate all routine, repetitive tasks to TrakIT.
  • Custom Interfaces: Interface with port authorities, shipping lines, finance systems, GPS vendors or any other API-capable systems.


Join the Digital Transformation

Embrace the future of freight forwarding with TrakIT. Discover how our software can revolutionize your operations and position your business for success in the Canadian market.

sales@trakit.in 

Saturday, 1 July 2023

Vendor Management & Billing

Did you know that you can ask your vendors to upload their bills directly in TrakIT? And you can approve or reject them? Let's take a look at how this can be done.


Vendor Expense Linking

A vendor is an entity that is providing services to your company. If you are using the finance module of TrakIT, then you register the expenses related to the shipment under the Job Finance page. These expenses (or disbursements) can then be linked to the billing party (vendor).

Below is an example of how income and expenses look.


The Entity column displays the billing party or vendor for the expenses registered. If a Bill has been received and/or validated, it is displayed under the Inv/Bill column.


Vendor Registration

If you would like to provide access to your vendor to be able to upload bills directly in TrakIT, you will first need to create a user profile and then link the user to the Entity that represents the vendor.

1) Go to Admin > User Management > External tab.

2) Create a new user. A welcome email with credentials will automatically be sent to the email address provided.


3) After creating the user, go to the Linked Entities tab and click 'Add Entity'.


4) Once the Entity is linked, you can switch to the Access Control tab to select which menus should be available to the user.


Vendor Portal

Once the vendor receives their credentials via email, they will be able to sign-in to TrakIT. On the Bills page, they will be able to add a new bill.


After creating the bill, the vendor has the option of adding more supporting documents or modifying the bill fields before finally submitting it.

The vendor can also see a list of all bills submitted and their approval status.


Approval & Rejection

Once the vendor uploads the bill, it appears under the Finance > Bills page as a Submitted Bill.


There are options to Accept, Reject or Delete the bill submitted by the vendor. On acceptance or rejection, an email is sent to the vendor notifying them of the same.

Once a bill is accepted, it can be used in the normal way by assigning expense accounts and then validating the bill.


For any questions or concerns, please contact the TrakIT Support team.